Making blog

Next I use a Peobo low fire marker to draw on robotic and facial expressions!

I have been out of studio for a little while...
Eric and I zoomed and he designed a fierce predator for the Octopus Slapper to face!
I have made the models with furnace glass at the glass blowing bench with hot bits rather than on the torch. There are many methods to choose from when forming glass, sometimes it takes a few tries to find the best one for the job.

Next step is to flamework the Octopus Slapper itself. Starting with the tentacles!
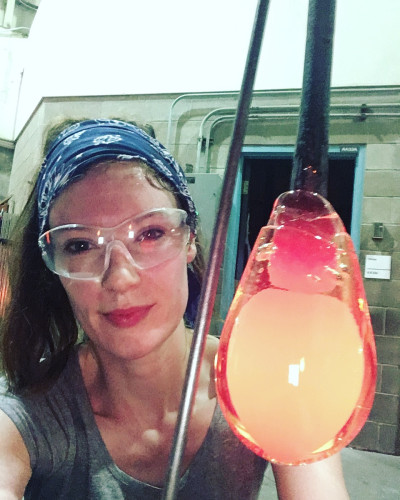
Flameworking is melting rods of clear and coloured glass in order to sculpt desired shapes and patterns.. like tentacles with suckers! When the glass is hot it appears different in colour then when it is cooled to room temp.
In both renditions I will be fabricating the Octopus in sections for accuracy and a robotic look.

The second rendition of the Octopus Slapper 2000 will be made up of flameworked glass models.
First, I have made fish with both a neutral and a shocked/ scared expression to illustrate the emotion of when a predictor approaches. The final result will be a mini animation showing the function of Eric's invention!

I have been cutting and sewing together the Octopus head and fish! The eyes were added and embellished with embroidery thread.

Here is my plan for how to translate the Octopus Slapper into a huge interactive textile stuffy.

After many late nights wrestling with code, superglue and fiddly bolts the Sound Collector is finally ready for testing. I am really pleased with how it turned out. I think that it looks like it could go to the moon and it really does collect sound. It is quite uncanny when you walk up to it at it turns to hear you. It is on its way to Canada now, hopefully it still works when it gets there! I had to design it so that it can come to pieces and be reassembled which in the end made it even more like a proper machine. I had to open it up so many times to tweak it that I decided to have all the wires and arduino visible and stuck it to the bottom - I think it makes it look even more spacey!

I heard that when they were making the Star Wars movies they made all the spaceships by 'bashing' together bits and pieces from Airfix kits. I really wanted to try this for this invention. Unfortunately Airfix kits are really expensive! so I had to search elsewhere. Eventually I found a fire engine that was made of lots of really useful parts and a Mechano kit that I thought would come in handy. I didn't just want this model to look like it worked I wanted it to ACTUALLY work! So I went shopping around for electronics that can bring the sound collector to life. I found a tutorial on Instructables to create a motion following robot : https://www.instructables.com/id/Motion-Following-Robot/
Looking at Eben's drawing I thought it would be cool if the boom could point towards motion so that it could then record sound. This would be useful when looking for aliens. As a sound collector it HAD to collect sound. I found this tutorial to create an LED screen that displays sounds: https://learn.adafruit.com/adafruit-microphone-amplifier-breakout/overview
Once all my kits had arrived, I had to get them all working together. This took most of my time; getting them to work as they are in the instructions was easy but getting them to do what I needed was tricky! I eventually, after hours of tweaking I managed to get all the electronics blinking and moving. Next I had to make something to but them all in. I took the fire engine to pieces and sanded all the parts to spray paint them (or the paint peels off). I kept all the stickers and the metallic parts separate and once dry I had a pile of bits of mechanical looking plastic to piece together. Assembling the robot from these parts was really fun. I kept Eben's drawing in front of me and a print out of the Mars rover for inspiration while I was assembling the model. I realised early on that I had to make it so that It could be disassembled (to fit in the post to Canada!), this meant that all the bolts in the Mechano kit came in really handy and I used the metal brackets to hold the servo in place. The Mechano kit's plastic parts (I think it was for a helicopter) slowly turned into the Sound Collector's robotic legs and the wheels of the fire engine became suction pads.

I had a video call with Eben and we chatted about why he designed the Sound Collector. It is to help astronauts when they are on the moon or planets to collect sounds easier. I showed Eben a picture of the next Mars lander as I found out they are adding microphone for the first time. We talked about how it would look and how big the robot should be - about the size of a small dog and it should be metal and grey.

Description This making process is turning out to be very fun and very hard. I had a go at making a conveyor belt but it turned out to be difficult without access to precision instruments, so I spoke to another tinkerer (my friend Darren Kent from Spitfire Architecture) and we agreed that instead of a conveyor belt, maybe I could make a track of some kind, and run the plants around it on some kind of carousel. I got a hat box and painted white for the base. On the hat box sits a ring-shaped track. The plant capsules will be attached to castors so they travel around the track. These capsules will be like horses on a carousel-like structure, which will be powered from the top (or possibly from the bottom, depending on what works best), by a battery-powered motor (designed for spinning garden ornaments). The whole thing will be covered with a massive plastic cloche (the type you can use to cover seedlings) and this will act like the dome of my rocket. I am hoping to make it look like a kind of space plantation inhabiting the upper storeys of a dome-shaped nose-cone, with little astronauts moving around underneath. Wish me luck!

I loved the idea of something that could stop your food floating around in space and wanted to make a prototype to show Brigitte's great idea off. I had a good chat with her on skype and got some excellent feedback on my plans for making of her idea.
After a bit of thinking about making it look like the food is floating, I bought a rotating display motor and hid it inside the box. This would great the turning movement.
I bought a food tray dome and used a laser cutter to cut a hole in the top and also create a yellow lid to match the drawing.
For the food I bought some fake buns and doughnuts but needed to work out how to make them appear to float. I bought some clear acrylic rods from a model shop and made a sort of tree structure to hold up the food. I cut holes into the food and glued them onto the clear sticks.
The whole thing needs to be transported and packed up safely so I made the food and support sticks removable by sticking a magnet on the bottom and a bit of metal onto the motor. In this way you can stand the structure up through a hole in the box to set it up.
I was very happy with the way it finished and with the food slowly rotating it gives a good effect of no gravity floating.
Brigitte's idea was excellent and I'm sure CSA will be impressed, it was a pleasure to help make her idea come to life.

I thought that Brooke's Moon Coaster was a great way to get around the moon while also having lots of fun. I had a great skype chat with Brooke about her idea and got some excellent feedback on the making. Although I couldn't make a full size coaster, as my room isn't big enough, I wanted to make a good looking model of it.
After some thought about the size and how it might work I bought a wood box and joined the lid to the base to create a L shaped base. I wanted to make the moon rotate so bought some little pulleys and brass rods and experimented with different elastic and rubber bands to work out how to turn a handle at the front of the base and rotate the moon slowly.
Once I'd got the mechanism working well I bought a polystyrene ball and some plaster material that I used to create a moon texture. I cut out tiny circles from paper and stuck them on the ball to create craters by covering them in the wet plater. I used a brush to 'stipple' the plaster to make a moon surface.
For the roller coaster I went to the model shop and bought some plastic strips that I could cut and bend easily and added some plastic cut for the legs. The cart again was made from a sheet of plastic that I cut with a scalpel and made into the box. I bought some tiny sitting people and added blobby paint to make them look like they are wearing a space suit.
I experimented with painting the moon to get the best effect, it is a mixture of browns and yellows, I tried to let the darker colours get into the cracks and crevices.
Finally I painted the base black and hand painted starts onto it. I'm happy with the finish, it was a lovely project to work on and a great idea by Brooke.

For the space helmet, the design was quite plain and tidy, with a clear silver design and a large visor for the astronaut to see out of. Once I had selected a helmet that was close to the original design it was important to paint the silver top to reflect the sun from the helmet.
The emergency airbag that is due to inflate when the helmet has an impact needed to be clear so that the astronaut could get back inside to the ship. I used a clear Polyethylene Vinyl Acetate to create the barrier and experimented with various was that the airbag would fit between the visor and the astronaut. Some key details that Sophia included really brought the helmet to life, including the neck gaiter and the small device box inside the helmet.
Finally the worrying part, how do you replicate a loose asteroid hitting your helmet? This time a claw hammer came in useful! Several blows to the visor give the impression that an impact has occurred, and this reveals the life-saving device behind the visor.

Sophia had a clear vision for how her design would work in protecting astronauts when an accident might occur. When we Skyped to discuss the details of her design we talked about the functions of the invention and Sophia’s vision of how it would initiate. Due to the technical limitations in design development, we opted to create a looks-like model of Sophia’s design. As Sophia had drawn, it would be a space helmet that demonstrated the airbag in an exploded state so people can understand the concept.

The Georgimal stick, what an interesting concept to keep astronauts engaged and relaxed! The sketch brief was pretty detailed in this design. I wanted to bring the idea to life the most I could on earth. With the effects of gravity, I needed to decide how the Georgimal would fly! I was able to source a small drone that flys similar to how a Georgimal would in space.
I used a process called laser cutting to cut the profiles of the marshmallow launcher and the base of the stick. The post is made from polypropylene, a strong and lightweight plastic and the ball as shown in the design drawing sits on top to stop the Georgimal escaping.

With all the components ready I did some testing to how the glove and functions would go together. I adapted the tools to fit into the connectors so that they could be released and pop off with a click of a button. The fingers needed to be extended to fit everything in and I was able to use aluminium tape similar to the metal rings we see on spacesuits to join the extensions.
Each finger was carefully extended and the components put inside. The tools were adapted to fit their connectors and tested several times to ensure that they released. Eimaan was very pleased with the results and excited that her design had been realised how she imagined… the next Tony Stark of inventors!

Now I have an understanding of the brief the next task is to see how I am able to make a functioning looks-like-model of the design Eimaan has provided. The Glove will need to be sturdy to house the components. It is important in the design that the tools click off with a button.
I’ve chosen to use airline hose connectors, they’re reminiscent of the tubing connectors we see in space and provide the function the design requires.

Eimaan and I had a Skype call and we talked about what an industrial designer does and how that design is a big part of the world that we live in. Eimaan explained to me about her project and how she came up with the idea for the Tool Glove. We discussed what was important in the design and how I would go about creating her object. I was at the workshop when we had the call so I was able to give a tour of what the inside of a studio and workshop looks like.
I think it’s so important for people to get to understand how and where things are made, not only for design, but so we can make conscious decisions of the objects we choose.

The final fabric and finishing touches. I created ears for the bunnies from the same cream faux fur and used some pink felting wool to add colour. Using a dark brown wool I created the eyes, trying to give each slipper their own character.

Once the base of the slippers had been completed I then needed to work on the bunnies. I selected three different materials. The first material was a white faux fur which had a shine, more man made look about it. The second was a luxury cream faux fur which had a finer hair and softer colouring. The last was a hand made felt, made from sheep wool, this had a organic crafted look about it. I chose the luxury cream faux fur as it had a natural look and movement to it and it was the softest material. Something you defiantly would like to put your feet on after a hard day in space.
